In this tutorial, you will learn how to seamlessly insert a screenshot into your existing document. Follow the outlined steps to enhance your document with visual aids.
Step 1
To begin, open your existing document. Click on the ‘Edit’ option and then select any location within the document where you wish to insert a screenshot. Once you’ve chosen the spot, click on the screenshot icon to proceed.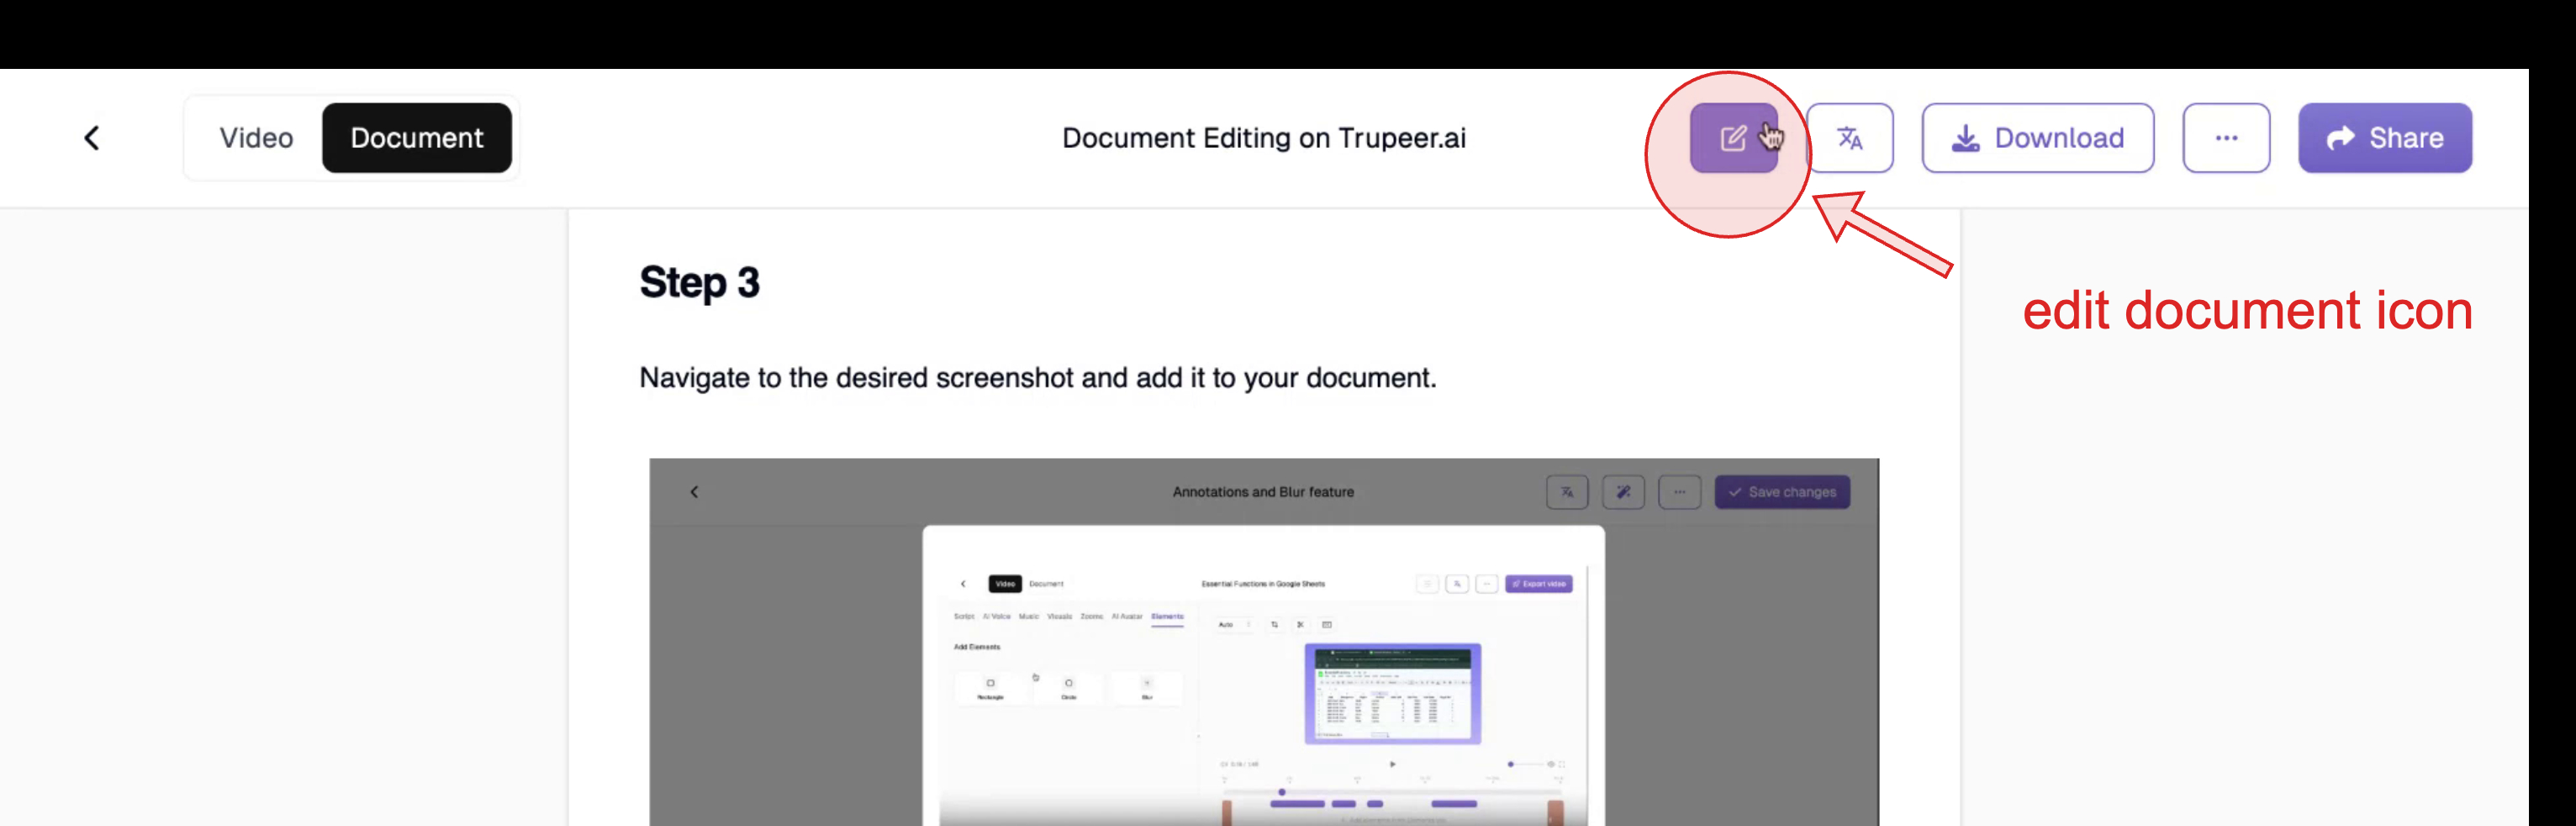
Step 2
You will have the option to add a screenshot from any visible area on your screen. Choose the screenshot you want to include and click ‘Add Screenshot’ to insert it into the document.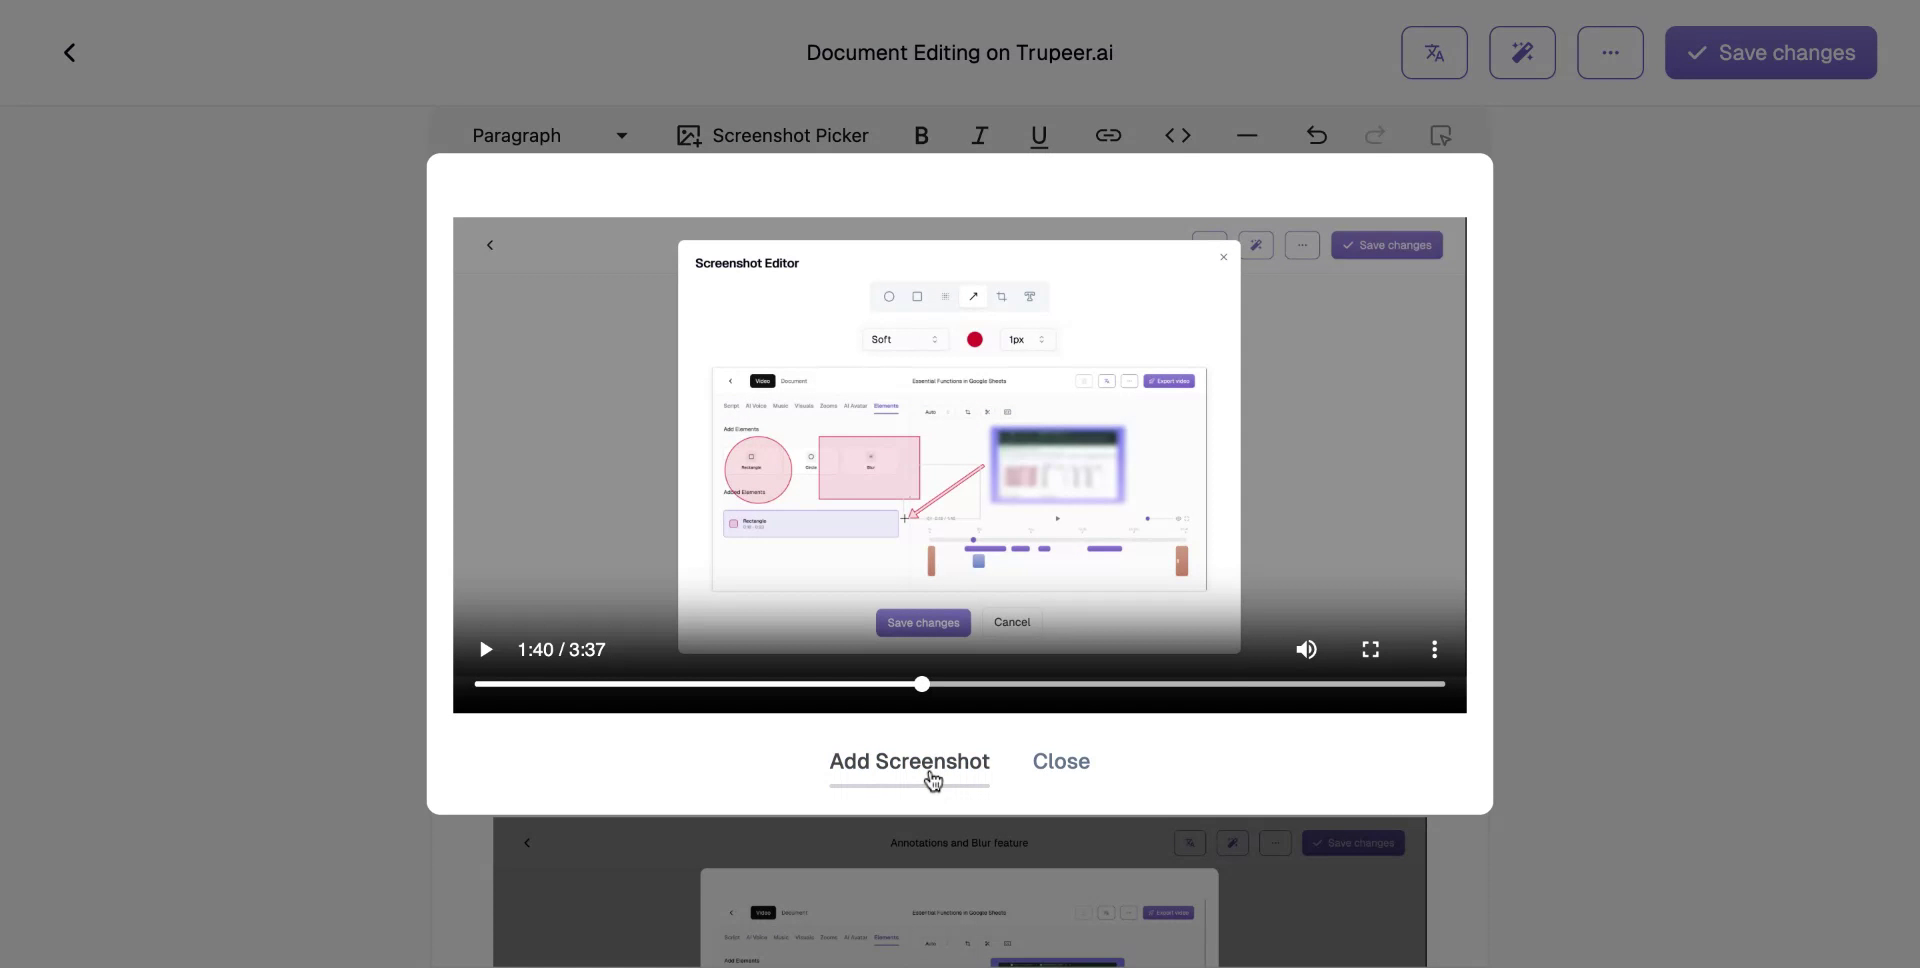
Step 3
After inserting the screenshot, click ‘Save Changes’ to ensure it is embedded in the document. Your screenshot will now be a permanent part of your document.